
Inside Trampoline Spring Tools and When You Really Need One
Author: Jump Star Trampolines Date Posted:23 August 2026
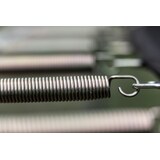

Trampoline Setup: Easier and Safer with Spring Tools
Attaching or removing trampoline springs can feel like a workout you did not sign up for. Cold metal, stiff springs, fingers slipping, and that little worry you might cop a spring to the knuckles. It is even worse when you are out on the lawn in late winter, trying to get the backyard ready before the kids start bouncing again in spring.
A trampoline spring tool is a simple hand tool that makes this job quicker and safer. It helps you pull and hook those tight springs with more control, less strain, and fewer scary slips. That means easier assembly, smoother maintenance, and less frustration when you are doing upgrades or safety checks.
Across Australian backyards, we see what heat, coastal air and uneven grass can do to trampolines. Springs can rust, frames can shift and parts can tighten up over time. Tools that are built for real local conditions can make all the difference when you are keeping your family trampoline in good shape.
What a Trampoline Spring Tool Actually Does
A trampoline spring tool usually has a simple T-shaped handle and a metal hook. The hook slips into the end of the spring, and the T-handle gives you something solid to grip. That extra length changes the angle and gives you better leverage, so you are not fighting the full tension with just your fingers.
With a spring tool, you can:
- Pull tight springs into place without twisting your wrists
- Keep your hands further away from sharp edges and moving metal
- Control the direction of the pull so the spring seats cleanly in the frame
Without one, your hands, wrists and even your lower back can take a beating, especially if you are leaning over a big round trampoline or a long rectangular one. Pulling by hand or using awkward tools can lead to:
- Slips that pinch fingers between hooks and frame
- Sudden releases that jerk your arm or shoulder
- Uneven tension when springs are not seated properly
Plenty of smaller trampolines can technically be set up without a spring tool, especially if they have lighter tension. But once you get into larger family models with stronger springs, that simple T-handle tool stops feeling like a luxury and starts feeling like the smart option.
Key Times You Really Need a Spring Tool
There are moments when a trampoline spring tool moves from "nice to have" to "why would you do this job without one?". Some of the big ones are pretty common in Australian backyards.
Here are the main times it really helps:
- First-time assembly of a new trampoline
- Installing a brand new mat
- Swapping out a full set of rusted, stretched or missing springs
First time setup is usually when people learn just how tight trampoline springs can be. The last springs are always the hardest, because tension is already high around the frame. A spring tool lets you pull in a straighter line and clip them into place without wrestling the metal.
Late winter and early spring are also big repair times. After months of rain, wind and cold, many families:
- Do a full safety check before the kids use the trampoline daily again
- Replace any springs that are rusty or not returning to shape
- Tighten the overall setup so the mat feels even and secure
On more advanced jobs, a spring tool is almost non-negotiable. That includes tasks like:
- Working on higher tension rectangular trampolines with long sides
- Adjusting springs on in-ground trampolines where access under the frame is tight
- Rebuilding or resetting springs after storm damage or a hard knock from flying debris
In these situations, you are often working in odd positions, around obstacles, or with springs that are under extra tension. Having a tool designed for that pull keeps the work safer and more controlled.
Comparing DIY Hacks and Proper Spring Tools
A lot of people try to get by with whatever is in the shed. We see all sorts of DIY options used as spring pullers, such as:
- Pliers or multigrip pliers
- Screwdrivers used as levers
- Rope loops or old tent pegs
- Random metal hooks or bits of wire
The problem is they are not made for the force or the angle. Pliers can slip off the spring and snap back. Screwdrivers can twist and scratch the frame or your hand. Rope can stretch or fray right when the tension is highest. Tent pegs bend, then you are stuck halfway through the job.
A proper trampoline spring tool gives you:
- A solid, comfortable grip that does not cut into your hand
- A hook sized for standard trampoline springs
- A straight pull that helps keep tension even around the frame
There is also the quiet cost of "making do". When you rush or wrestle with the wrong tool, it is easier to chip paint, bend hooks or damage the mat edge. That can shorten the life of parts you have already paid for, or work against any safety guidelines for your trampoline. A small, purpose-made tool often saves time, reduces frustration and helps keep the setup closer to how it was designed to be used.
How to Choose and Use a Spring Tool Properly
Not all spring tools feel the same in your hand. When you are choosing one, look for:
- Strong steel that will not bend under tension
- A comfy, non-slip handle that is easy to grip, even with gloves
- A hook that fits the size of your trampoline springs
- Clear advice that it suits your style and size of trampoline
Using the tool well is just as important as having it. A simple safe method usually looks like this:
- Lay out the mat so the logo or centre points line up correctly with the frame.
- Attach springs in a pattern that keeps tension even, often opposite sides first.
- Hook the spring into the mat, then use the tool on the frame end.
- Pull in a smooth, steady motion, keeping your wrist straight.
- Check each spring is fully seated in the frame and mat before moving on.
A few quick safety tips help a lot:
- Wear closed-in shoes and gloves for better grip and protection
- Check each spring and attachment point before you pull on it
- Keep kids well away while you are working on any part of the trampoline
- Take breaks if your hands or back start to feel tired
Good habits like these keep the job calm and controlled, instead of rushed and risky.
Keep Your Backyard Bouncing Safely All Year
A simple late-winter "trampoline tune-up" is one of the best ways to keep family play safe when the weather warms up. With a proper trampoline spring tool, you can inspect, tighten and replace springs and mats without fighting the hardware every step of the way.
Pairing that tool with the right replacement parts, like fresh springs, new mats, pads or nets that match your model, helps your existing setup last longer and feel better underfoot. At Jump Star Trampolines, we focus on trampolines and the gear that keeps them bouncing in real Australian conditions, from hot inland yards to salty coastal blocks.
Make Trampoline Maintenance Safer And Easier Today
If you are ready to take the hassle out of trampoline setup and upkeep, our trampoline spring tool is designed to help you get the job done quickly and safely. At Jump Star Trampolines, we focus on making family playtime smoother, from first assembly through to regular maintenance. If you have any questions about choosing the right gear or using it correctly, simply contact us and we will gladly point you in the right direction.