
Pre-Summer Trampoline Safety Checklist: What to Replace vs. What Can Wait
Author: Jump Star Trampolines Date Posted:6 September 2026
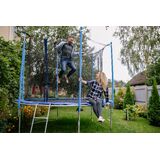

Get Your Trampoline Summer Ready, Safely
A quick safety check before the first big bounce can stop a fun summer afternoon from turning into an injury. When the weather warms up and the kids are home more, your trampoline suddenly becomes the main hangout spot again. That is exactly when any hidden wear and tear likes to show up.
Australian backyards are tough on trampolines. Harsh sun, salty coastal air, wind, storms and months of not being used can quietly weaken springs, nets, mats and padding. Things might look fine at a glance, but small problems in your trampoline parts can grow fast once everyone is back to daily jumping.
In this guide, we walk through a simple pre-summer inspection, using plain language and easy checks. We also sort issues into two groups: what needs replacing now to keep kids safe, and what can wait a bit longer while you plan ahead.
Spot Trouble in Your Trampoline Springs
Start with the springs, they control the bounce and help keep the mat in place. You do not need any special tools, just your eyes, hands and ears.
Walk around the trampoline and:
- Listen for squeaks or grinding when someone does a gentle bounce
- Look along each spring line for rust, gaps or twisted coils
- Gently pull a few springs out and let them go to feel how strong they are
Red flag signs that mean the springs should be replaced now:
- Heavy, flaky rust that comes off in chunks
- Any missing springs or obvious gaps
- Coils that look stretched, uneven or out of shape
- A strange, uneven bounce where one side of the mat feels loose or “dead”
If you see these, it is best not to let kids use the trampoline until the springs are replaced with proper like-for-like trampoline parts. Weak springs can snap or let the jumper slide off toward the frame.
Some spring issues can usually wait a bit longer, as long as you keep an eye on them:
- Light surface rust that brushes off with a dry cloth
- Small patches of discolouration with no flaking
- Springs that squeak a little but still feel tight and strong
With those, just plan to recheck them more often, especially as summer goes on.
Assessing the Safety Net Before Kids Start Bouncing
Next, move to the safety net, because this is what stops kids from bouncing off the edge. You want it standing tall, tight and well attached everywhere.
Do a slow walk around and check for:
- Tears or holes in the mesh
- Fraying seams or loose stitching, especially near the top and bottom
- Zipper issues, like loose stitching or a zip that comes away from the net
- Sagging or leaning poles that are not sitting straight
Replace the net or poles straight away if you notice:
- Any hole bigger than a 10 cent coin
- A broken or missing zipper, or a doorway that will not close properly
- The net has come away from the poles or attachment points
- Poles that are cracked, bent or wobbly even after you tighten the fixings
These problems can turn a safety net into a false sense of security, which is more dangerous than having no net at all.
Some smaller net issues can be watched for a while:
- Tiny pulls in the mesh away from high impact areas
- A zip that is a bit stiff but still closes fully once lubricated
- Faded fabric that still feels strong to the touch with no fraying
If you are near the coast or in high sun areas, check the net more often, as UV and salt air can speed up wear.
Checking the Mat for Hidden Hazards
The jumping mat does a lot of hard work, so give it a proper look. Clear off leaves, sticks and dirt first so you can see the surface clearly.
Then:
- Check the top for any cracks, shiny worn spots or rough patches
- Run your hand along the stitching around the edge where the mat meets the springs
- If you can, look under the mat for thinning, flaking or loose threads
Replace the mat now if you notice:
- Threads pulling apart around the border or where the spring attachments sit
- Soft, “spongy” spots that feel weaker than the rest of the mat
- Any cracks, splits or holes, even small ones, on the jumping area or near the edge
A damaged mat can tear suddenly when someone lands on it, which is not something you want to test.
Some wear is more cosmetic and can usually wait, as long as you stay cautious:
- Light fading from the sun with no change in fabric strength
- Minor scuff marks that do not catch your fingers
- Very small worn areas right out at the edge, away from the main landing zone
If you spot this kind of wear, start planning for a mat upgrade before it turns into a “replace now” situation.
Evaluating Padding, Frames and Smaller Parts
Padding helps cover the springs and frame, so kids do not land on hard metal. Over time, sun and rain can flatten foam and crack covers.
Check your pads for:
- Foam that has gone flat or lumpy instead of springy
- Splits or holes in the outer cover
- Loose or missing ties and clips that let the pads move
- Gaps where the padding no longer fully covers the springs
If the pads no longer stay in place or there are big gaps where a foot could slip through, treat that as a “replace soon” job. It might not be as urgent as a torn mat, but it is still a safety risk.
Now look at the frame and legs:
- Scan around joins for rust, especially where water can sit
- Gently rock the trampoline to feel for wobbling legs
- Check bolts and brackets for looseness
- Look for bending or warping in any part of the frame
Urgent frame issues include serious rust that eats into the metal, legs that will not tighten, or any bend that changes the level of the trampoline. On uneven Aussie backyard surfaces, a shaky frame can tip or shift.
Do not forget smaller trampoline parts:
- Ladder rungs that bend or move
- Anchor kits that have come loose after wild weather
- Plastic caps and covers that have cracked or fallen off
Missing caps are often more cosmetic, but loose anchors or a weak ladder are worth fixing quickly.
Smart Replacement Choices Before the Heat Kicks In
By now you should have a clear idea of what needs attention. To make smart choices, think about what your kids use most and what would cause the most harm if it failed.
As a simple guide, many families choose to prioritise:
- Mat issues first, because that is the main landing area
- Net problems next, to stop falls off the side
- Springs after that, to keep a strong, even bounce
- Pads and smaller parts last, unless there are big gaps or exposed metal
When you do replace parts, choosing like-for-like trampoline parts that are designed for Australian backyards helps with both fit and safety. Local conditions like strong UV, salty air and sudden storms are tough on gear, so it pays to pick parts built with that in mind.
A simple action plan can make future summers easier:
- Write down any problems you find and take clear photos
- Note your trampoline brand, model and size so parts match correctly
- Order replacements before the pre-Christmas rush and busy delivery period
- Set a reminder to do a quick safety inspection at the start of every season
At Jump Star Trampolines, we see how a little time spent on checks can give families a lot more confidence when the kids start bouncing again. With a clear “replace now vs can wait” list, you can enjoy those long, warm afternoons knowing your trampoline is ready for another Aussie summer.
Keep Your Trampoline Safe, Fun And Ready To Use
If your mat, springs or padding are looking worn, we can help you find the exact trampoline parts you need to get bouncing again with confidence. At Jump Star Trampolines, we stock quality components designed to fit and last, so you do not have to compromise on safety. Browse our range online or reach out through our contact page and we will guide you to the right replacement parts for your setup.