
Pre-Summer Trampoline Parts Checklist: What to Measure Before Ordering
Author: Jump Star Trampolines Date Posted:30 August 2026
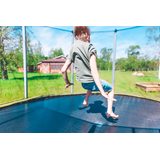

Prepare Your Trampoline for a Safe Summer
A quick check of your trampoline before the warm weather hits can save a lot of stress later. When the days get longer and kids are home more, the trampoline suddenly becomes the busiest spot in the backyard, so it needs to be ready for constant use.
A pre-summer inspection helps you spot worn or damaged parts early, before they fail during a big bounce session. It also means you can order the right trampoline replacement parts the first time, instead of guessing sizes and shapes. With a few simple measurements and some clear photos on your phone, shopping for parts online becomes much easier.
This checklist works for round, rectangular, and in-ground trampolines. We will walk through what to measure, what to photograph and what to note, so you can feel confident your trampoline is safe and ready when the hot days arrive.
Measure the Frame and Mat Before You Shop
The frame and mat work as a team. If they do not match, you can end up with:
- Unsafe tension on the springs
- A saggy, flat bounce
- Overstretched stitching that wears out faster
For round trampolines:
- Measure the frame diameter from edge to edge, straight through the centre
- Measure the mat from stitching line to stitching line, not including any outer flap
- Walk around the mat and check for faded, thin or shiny spots that might show sun damage
For rectangular trampolines:
- Measure the full length and full width of the frame
- Measure the mat length and width in at least two spots to see if it is even
- Note any corners that look pulled or out of shape
Handy photo ideas:
- One clear shot from above showing the full trampoline, including frame and mat
- Close-ups of any frayed stitching, small tears or worn logos
- A side shot that shows how tight or loose the mat looks over the springs
These notes and photos make it much easier to match your setup with the right size mat and frame-related parts when you are browsing trampoline replacement parts.
Count and Measure Springs with Confidence
Springs are what give your trampoline its bounce. If the length or number of springs is wrong, you can get:
- A weak bounce that feels flat
- Extra strain on the frame
- Faster wear on the mat edge
To count your springs:
- Pick a clear starting point, such as right next to the net entry
- Move around the frame in one direction and count every spring
- Write the number down straight away or type it into your phone notes
To measure a spring:
- Remove one spring carefully by unhooking it from the frame and mat
- Measure the full length from hook to hook while the spring is relaxed
- Check a few springs from different parts of the frame in case some have been swapped in the past
Helpful spring photos:
- A close-up of a spring in place, showing how it hooks to the frame and mat
- The removed spring next to a ruler or tape measure
- A wide shot of the full frame showing the spacing of the springs
These details help you order trampoline replacement parts that match the original bounce and protect the frame and mat from extra stress.
Check the Safety Net, Zipper and Entry Design
The safety net does a lot of work keeping jumpers away from the edge, especially with excited kids and friends taking turns. In the Australian sun, the net is often one of the first parts to wear out.
Start by checking:
- The net fabric for UV damage, fading, stiff or brittle spots
- Any holes, pulled stitching or loose threads
- The top and bottom edges where the net connects to poles or the frame
Then, look closely at the entry area and note:
- Is it a single zip, double zip, or an overlapping entry?
- Does it have zip plus buckle clips?
- Does the zipper close upwards or downwards?
Useful photos to capture:
- A full-height shot of the net all the way around
- Close-ups of the zipper head, puller and any clips
- The entry area from both inside and outside
- Any brand tags or labels near the net or sleeves
Having this detail on hand makes it much easier to choose the right net, zipper style and other trampoline replacement parts to suit your current setup.
Identify Pole Caps, Sleeves and Attachment Styles
Pole tops and net attachment systems can vary a lot, even between trampolines that look similar at first glance. This is where good photos really matter.
Check the pole caps and note the style:
- Flat caps
- Domed or mushroom-shaped caps
- T-connectors or U-shaped brackets
- Caps with slots for net straps or for plastic clips
Then, look at how the net connects to the poles:
- Straps looped over the top of the caps
- Plastic clips that snap onto a groove or slot
- Long sleeves that slide over the whole pole
- Ties that attach directly to the cap or pole
Also note whether the poles are straight or curved, and how they attach to the frame.
Photo ideas for poles and caps:
- A clear shot of a cap on its own if it can be removed
- A top-down view showing the cap with the net or straps attached
- A side-on photo of the whole pole from frame to top
These details are very helpful when you are choosing new nets, poles, caps or other trampoline replacement parts that must match specific fittings.
Capture Frame, Pad and Anchor Details for a Full Refresh
While you are there, give the rest of the trampoline a quick once-over so you have a full picture before you order anything.
For the frame:
- Check tubes, joints and welds for rust, bending or cracks
- Pay extra attention if you live in a coastal or very wet area
- Look underneath too, not only around the top edge
For the safety pads:
- Press the foam to see if it still feels thick and springy
- Check the vinyl for cracking, peeling or fading
- Make sure the pad fully covers springs and frame edges all the way around
Anchoring is also worth a look before storm season:
- See if you already have an anchor kit installed
- Check straps, stakes or brackets for corrosion or wear
- Make sure anchors are still tight and holding firm in the ground
Handy photos to round out your checklist:
- Corners and joints on rectangular trampolines
- Under-frame shots for in-ground models to show how the frame sits
- A top-down photo showing full pad coverage and overall condition
When you put all of this together, you get a clear snapshot of what is still safe and what needs replacing.
Turn Your Checklist Into a Safe Summer Upgrade
By now, you should have a full set of notes and photos: frame and mat measurements, spring count and length, net and zipper style, plus clear shots of pole caps, pads, frame and anchors. This is exactly the kind of detail that makes ordering trampoline replacement parts simple and stress-free.
We recommend keeping everything in one place, such as a folder or album on your phone with a short checklist in your notes. That way, when you are ready to shop, you can match what you see on screen to what you already know is in your backyard.
At Jump Star Trampolines, we focus on safe, durable trampolines and parts for Australian families, so we know how much a well-timed pre-summer refresh can help. A quick yearly check like this keeps your trampoline safer, extends its life and means your backyard is ready for long, happy bounce sessions as soon as the warm weather hits.
Keep Your Trampoline Safe and Ready for Action
If your trampoline is starting to show signs of wear, we can help you refresh it with quality trampoline replacement parts that fit and last. At Jump Star Trampolines, we stock components designed to keep your family bouncing safely and confidently. If you are unsure what you need or have questions about compatibility, simply contact us for straightforward advice and support.