
Installing an In-Ground Trampoline Without Ruining Your Lawn
Author: Jump Star Trampolines Date Posted:12 October 2026
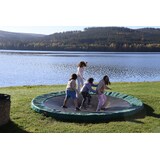

Protect Your Lawn While Creating Backyard Fun
Putting in an in-ground trampoline is a great way to add fun to the backyard without a big metal frame blocking the view. The low height feels safer for little kids, looks cleaner, and does not catch the wind as much as a tall above-ground trampoline. It can sit neatly in the lawn so the yard still feels open and easy to use.
The big worry for most families is what happens to the grass. No one wants a ring of mud, dead turf, or a soggy pit that fills with water every time it rains. When we plan the setup properly, we can keep the lawn healthy and still get a great jump area.
In this guide, we will walk through how to plan, dig, drain and finish an in-ground trampoline so it suits Australian backyards. We will focus on simple, lawn-friendly choices that suit local soil, sun, and council expectations, especially on typical suburban blocks.
Choose the Best Spot to Keep Grass Green and Healthy
The job starts with where the trampoline will go. A good spot makes everything easier, from digging to mowing later.
Look for an area that is:
- Fairly level to begin with
- Away from overhanging branches
- Clear of sheds, clotheslines and garden beds
You want enough space for safe use, but also room for mowers and kids running around the outside.
Think about sun and shade. Grass needs light, but the edges of an in-ground trampoline can dry out fast in hot Aussie summers. If the area gets full sun all day, be ready to water the surrounding lawn a bit more and use mulch or pavers nearby to protect high-traffic zones. If it is in deep shade most of the day, the turf may thin out and get patchy.
Before anyone starts digging, it is smart to check what is under the ground. Use Dial Before You Dig to check for:
- Power lines
- Water or gas pipes
- Drainage pipes
Also look at local council guidelines to see if there are rules about excavation depth, drainage, or distance from fences. Any approval needed can shape details like how deep the pit can go and where you send excess water.
Smart Excavation That Respects Your Turf
Once the spot is sorted, careful excavation will protect your lawn from long-term damage. Rushing this stage is what usually leads to crumbling edges and ugly bare rings.
Start by marking out the jump zone based on your chosen in-ground trampoline size. Use the model measurements and add a small border where the lawn will meet the frame or edging. A clean circle or square is easier to finish neatly than a wobbly shape.
When the digging starts, ask for the top layer to be removed and saved:
- Cut the turf in sections like tiles
- Peel back the turf with a thin layer of topsoil attached
- Store it in the shade and keep it just damp
This saved turf can often be reused around the trampoline after installation, giving you instant green again.
As the pit is shaped, the sides should not be too steep. Steep walls under the lawn edge can slump or crack over time. Gentle, stable slopes help keep the turf edge from collapsing and make it easier to manage airflow under the trampoline for a good bounce.
Drainage Solutions That Stop Mud and Moss
With an in-ground trampoline, water has fewer places to go, so drainage is a big part of protecting your lawn. In many Australian backyards, heavy summer rain can run across the surface, then sit in low spots. A sunken pit without drainage quickly turns into a pond, and that causes mud, moss, and bad smells.
Think about how water currently moves across your yard. Does it flow toward the planned in-ground pit, across it, or away from it? This will help you pick a drainage setup. Common options include:
- A gravel base in the bottom of the pit
- A soak well below the deepest point
- An ag drain pipe that leads water to an existing drain line
Some sandy or free-draining soils may cope with a simple gravel layer at the base, as long as the pit is not in the lowest part of the yard. Heavier clays, or yards that already get boggy, will usually need a more direct drain line.
To protect the turf around the edge, it can help to set the finished trampoline frame slightly proud of the lawn or give the grass a gentle fall away from the edge. This reduces water pooling at the join where grass meets frame and stops a muddy ring from forming each time it rains.
Lawn-Friendly Installation Techniques and Materials
The type of in-ground trampoline frame you choose matters for both safety and the health of the surrounding lawn. Look for frames and parts that are built to handle soil contact and changing Aussie weather. A strong support structure helps the trampoline sit solid in the pit, which means less movement that could disturb the lawn edge. Good airflow under the mat and vented pads also help keep bounce quality and can reduce moisture build-up.
Around the outside, edge treatments make a big difference to how the lawn holds up. Some popular choices are:
- Pavers set flush with the grass
- Rubber edging that gives a soft, neat border
- Reinforced turf edge with a plastic or metal strip hidden under the grass
These edges stop mower wheels and feet from breaking the soil line. They also give you a visual guide so you do not clip the frame with your mower or trimmer.
When it is time to put the grass back, break up any compacted soil before relaying turf. Use a soil blend that suits local conditions, so it drains well but still holds enough moisture for roots to grab on. Water gently but often at first so the grass can knit quickly around the trampoline and handle extra foot traffic.
Maintain Your in-Ground Trampoline Without Scarring the Yard
Once everything is in and the turf has started to settle, your regular care will decide how good the lawn looks long term. Mow right up to the edge, but keep the mower deck level so it does not scalp the grass near the frame. With a whipper snipper, move slowly and angle the line away from the frame pads to avoid cutting into the turf or the padding.
Seasonal lawn care makes a big difference around high use areas:
- A light fertilise in spring for thick growth
- Deeper watering in summer during hot spells
- Gentle aeration in autumn to relieve compacted soil
Alongside lawn care, give the trampoline itself a regular once-over. Check pads, mat and frame for wear, and clear out leaves or rubbish that may collect in the pit. If you notice small ruts forming where kids jump off the mat and land on the grass, top-dress and re-seed before the area turns into bare dirt.
Turn Your Lawn and Trampoline Into a Long-Term Asset
When an in-ground trampoline is planned with the lawn in mind, the whole backyard feels more open, safer and easier to enjoy. You get a tidy, low-profile jump zone that blends into a green, inviting space for summer holidays, backyard barbies and everyday play.
The best results come from a staged approach: plan the position, dig with care, sort the drainage, install the frame, then give the turf a few weeks of gentle use to recover and knit around the edges. Timing the project for late winter or early spring often works well in many parts of Australia, as the grass is ready to grow strongly as the weather warms. With good gear and a bit of simple upkeep, your lawn and in-ground trampoline can stay a highlight of the backyard for years.
Transform Your Backyard With A Safe, Stylish Trampoline Setup
If you are ready to upgrade your outdoor space, our team at Jump Star Trampolines can help you choose the ideal in-ground trampoline for your family and yard. We work with you to ensure the right size, safety features and installation approach for a long-lasting result. To discuss your plans or get a tailored quote, simply contact us and we will walk you through the next steps.