
In-Ground Trampoline Site Checklist: Drainage, Soil, and Utilities
Author: Jump Star Trampolines Date Posted:26 July 2026
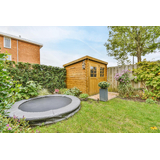

Build a Safer, Smarter in-Ground Trampoline Site
A good in-ground trampoline starts long before the first shovel hits the soil. The spot you choose and the way you prepare it will affect safety, drainage, and how long the trampoline stays solid under your kids’ feet. Getting the site right helps you avoid soggy pits, shifting frames and damage to your home or garden.
Late winter is a great planning window in Australia. The ground is usually softer from rain, you can see how water moves across your yard and you still have time to sort out approvals and trades before the warmer months. In this guide, we will walk through three big checks you should do before you dig for an in-ground trampoline: drainage, soil type and underground services. When these are thought through early, the build is smoother and the trampoline feels better to use for years.
Choosing the Best Spot in Your Backyard
Start by standing back and looking at your whole yard, not just the corner that looks free right now. An in-ground trampoline becomes a permanent feature, so it needs a safe, open space with room to move.
Aim for an area that is:
- As level as possible, or with only a gentle slope
- Clear of low branches and large shrubs
- Away from fences, sheds, pools and clotheslines
- Not directly in front of big windows or glass doors
You also need safety clearances, both around and above the trampoline. Even though an in-ground model sits lower, kids can still jump high, and adults will use it too.
Keep in mind:
- At least a couple of metres of clear space around the edges
- Overhead space free of branches, eaves and powerlines
- Space for safety padding, retaining walls and edging
- Room for future accessories like safety nets or shade
If the trampoline is close to a boundary, it is worth checking your local council rules. Some areas have guidelines about structures near fences or over easements. It is also a good idea to chat with neighbours if the trampoline will be visible over their fence or if kids will be bouncing near shared boundaries. Sorting this early can avoid headaches later.
Understanding Your Soil Before You Start Digging
Not all soil behaves the same when you dig a big pit and place a trampoline in it. Across Australia, yards can have anything from clay to sand or a mix of both. Knowing what you are working with helps you plan for stability and drainage.
Common soil types include:
- Clay: Heavy, sticky when wet, often drains slowly
- Sandy: Light, gritty, drains fast but can shift easily
- Loam: A balanced mix of sand, silt and clay, usually stable
- Reactive soils: Clays that swell when wet and shrink when dry
You can do a simple test yourself. Grab a handful of slightly damp soil from about spade depth. Roll it in your hand:
- If it forms a smooth sausage that bends without cracking, it is likely clay-heavy
- If it crumbles and feels gritty, it is sandy
- If it holds shape but breaks with a bit of pressure, it may be loam
Watch what happens after rain too. Does water puddle for a long time, or does it soak away quickly? If you notice big cracks in dry weather or long standing water, it is worth checking with a professional, like an engineer or experienced installer, especially for larger trampolines or sloping blocks.
Compaction and slope stability matter as well. Walls of the pit should not crumble, and the base should be firm and flat. In some soils, you may need:
- Compacted layers at the base to support the frame
- Temporary shoring or careful benching while digging
- Retaining rings or low walls inside the pit to hold back soil
Taking soil behaviour seriously reduces the risk of cave-ins during digging and stops the trampoline from settling unevenly over time.
Getting Drainage Right so You Do Not Build a Sunken Swamp
Drainage is the number one issue for any in-ground trampoline. Without a plan, the pit can act like a big bucket, filling with water after heavy rain, especially in winter and spring. That leads to muddy smells, rust risk and a surface that never quite feels dry.
Good drainage usually starts with:
- A gravel layer at the bottom of the pit
- A gentle fall so water runs to a low point
- A way for water to leave that low point
Depending on your block and soil, options can include:
- French drains: Trenches with perforated pipe wrapped in gravel that carry water away
- Soakage or rubble pits: Underground areas filled with rock where water can slowly disperse
- Sump pit and pump: A small pit with a pump that moves water to a safe outlet
- Connection into existing stormwater lines, where allowed and set up by a plumber
Before you finalise the design, do a simple drainage check:
- Watch how water moves during a decent rain, especially on slopes
- Use a hose to fill a test hole roughly where the pit will be and see how fast it drains
- Note any low spots that already pool water in your yard
- Plan a clear outlet for excess water so it does not back up under the trampoline or towards your house
In many cases, having a qualified landscaper, drainage professional or plumber involved is the safest path. That way, any links to stormwater are done correctly and in line with council rules.
Checking Underground Services and Site Hazards
Before you think about digging, you need to know what is under the ground. Hitting a gas line, sewer pipe or power cable can cause serious harm and damage.
Key underground services to locate include:
- Gas
- Mains water
- Sewer and stormwater pipes
- Power and NBN
- Any known easements or service corridors
You can use national “before you dig” services, old house plans, builder documents or council records to build a picture of what is below. Mark these on the ground clearly with paint or flags.
There are also other hidden hazards:
- Garden irrigation lines
- Old concrete footings or rubble
- Greywater systems or septic tanks
- Existing drainage trenches
- Large tree roots that may regrow or destabilise soil
A safe basic process looks like this:
- Gather and study service plans for your property
- Mark out all known or likely service paths on the ground
- Set no-dig buffer zones along marked lines
- Use hand tools only when working near any marked service
- Bring in licensed trades when moving or exposing utilities
If there is any doubt about the exact location of a service, treat that area with extra care and consider getting a professional locator involved.
Planning Your in-Ground Trampoline Build with Confidence
A great in-ground trampoline site comes from a bit of thought upfront. You pick the right location with clear space around and above, you understand how your soil will behave under a large pit, you give water a smart way out and you check every underground service before excavation starts.
Late winter is a handy time to do these checks, because you can see how your yard handles wet weather and still have time to line up help for the build before the warmer months. With a clear plan in place, you can enjoy smoother installation and a safer trampoline that feels solid for family use.
At Jump Star Trampolines, we focus on safe, durable in-ground trampoline models for Australian backyards, along with matching accessories and parts. When you are ready to choose a size and shape that suits your site, our team can help match the trampoline to the space, soil and setup you are working with.
Transform Your Backyard With A Safe And Stylish Play Space
Ready to create a cleaner look and a safer jumping area for your family with an in-ground trampoline? At Jump Star Trampolines, we help you choose the right size, safety features and installation options to suit your yard and your kids. Get tailored advice from our team and start planning your upgrade today by using the details on our contact page.