Top Tips for Trampoline Setup and Placement
Author: Jump Star Trampolines Date Posted:16 June 2025
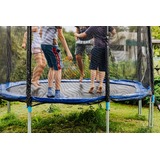
Getting a trampoline is an incredible way to bring joy and physical activity straight into your backyard. However, to truly enjoy your trampoline, it's crucial to set it up and place it correctly. This not only enhances the fun but also ensures safety for everyone using it. Whether you're thinking about adding a rectangle trampoline to your outdoor space or have recently purchased one, understanding how to properly set it up can make a significant difference.
The setup and placement process isn't as challenging as it seems. With the right guidance, you'll find it straightforward and even rewarding. We'll go over how to choose the ideal spot for your trampoline and share practical tips to make assembly a breeze. By focusing on these steps, you can ensure that your trampoline is ready for endless hours of safe jumping fun.
Choose the Right Location
Finding the perfect spot for your rectangle trampoline in your yard is a vital step. It's important to assess the ground level first. Look for an area that's flat and even, as this will provide a stable foundation for your trampoline. An uneven surface can affect its stability and lead to potential safety hazards.
Next, ensure the area is spacious and free of obstacles. Trees, fences, and other structures should be a safe distance away to prevent anyone from bumping into them while jumping. Additionally, having a clear zone around your trampoline adds an extra precautionary measure for safe play.
Consider the elements when choosing your location. In Perth, WA, sun exposure and wind direction can impact how you set up your trampoline. Opt for a spot that offers some shade to protect jumpers from direct sunlight during the hotter months. If possible, place the trampoline where trees or structures can shield it from high winds to avoid any movement risks.
When you've finally picked the best location, you're ready to move on to the assembly process. Make sure to keep the surrounding safety considerations in mind as you continue setting up your trampoline for optimal enjoyment.
Assembling Your Rectangle Trampoline
Once you've selected the perfect spot, it's time to put your trampoline together. Setting up your rectangle trampoline might seem like a big task, but breaking it down into clear steps can make it manageable. Start by laying out all the parts so you know you have everything you need. This includes the frame, springs, jumping mat, and safety net.
First off, connect the frame pieces according to the manual. It's important to follow the instructions carefully to ensure the structure is safe and sturdy. Next, attach the legs and secure them with the bolts provided, making sure they are tight. When attaching the jumping mat, it's a good idea to start with the corners and work your way around, attaching the springs evenly so that tension is distributed equally.
Here's a quick checklist to guide your assembly process:
- Lay out all parts and cross-check them with the manual
- Assemble the frame and ensure all connections are firm
- Attach the legs securely
- Fix the jumping mat starting from the corners
- Safely attach the safety net
Don’t rush through this process. Taking your time can help you avoid mistakes such as missing a bolt or misplacing a spring, which could affect the safety and durability of your trampoline. If you're unsure about any step, refer back to the manual or get a hand from a friend or family member.
Placing the Trampoline
Once assembled, positioning your trampoline correctly is the next critical step. You want the trampoline to be level and free from any wobble. Shift it into place and check the stability by giving it a little shake. If it feels unstable, you might need to adjust the legs slightly or place it on more even ground.
Creating a clear area around the trampoline is non-negotiable for safety. This means no hard surfaces or furniture close by that someone could fall onto by accident. A soft grass base is ideal. Additionally, it’s wise to secure the trampoline to prevent it from moving during use. Anchor kits can be particularly useful for this task, as they help keep the trampoline in place even if it's windy.
In positioning your rectangle trampoline, think of it like setting a safe boundary for your fun zone. Keeping this clear space ensures that whether your kids are doing flips or just bouncing up and down, they’re playing in a safe, controlled environment.
Safety Measures and Final Checks
Before the jumping begins, take a moment for final checks that ensure everything is as it should be. Installing safety enclosures and padding is an extra step that makes a big difference in reducing injury risk. These enclosures keep jumpers within the bounds of the trampoline, while padding covers the springs and frame, preventing accidental pinches or bumps.
Go through a quick checklist for peace of mind:
- Verify all bolts and screws are tight
- Ensure the safety net is correctly installed
- Check all springs for secure attachment
- Make sure padding covers every metal edge
It's also smart to establish a regular maintenance schedule. Periodically check for wear and tear, especially after extreme weather or heavy use. This way, everyone hopping on will continue enjoying a safe experience.
Jumping into trampoline fun should be all about laughter and exercise without worries over safety or structure. By taking these setup and placement steps seriously, you create a secure environment ready for countless hours of enjoyment.
Are you ready to transform your backyard into a haven of fun and fitness? Discover the impressive selection of rectangle trampolines in Australia offers, right here at Jump Star Trampolines. Our top-quality trampolines are designed to enhance safety and enjoyment, creating countless opportunities for active play. Contact us today and start planning your ultimate backyard oasis!